|
Today the selfie stick
seems to be the way to go when
taking self-portraits using your phone. It's
quick and easy and you get close up shots of
yourself and the background image you are trying
to capture. However, a selfie stick
does not offer the same versatility as a tripod.
In fact, you can easily use your tripod as a
selfie stick when required or use it as a true
tripod to capture yourself and background images
from a distance.
Your tripod and camera go hand-in-hand. In
fact, we often walk around holding the tripod
with legs compressed and the camera attached.
This makes it quick and easy to take normal photos
or setup somewhere to take a tripod photo.
A tripod will also allow you to take clear night
and extended zoom photos without blurring.
With a tripod, you no longer
have to hand your camera
to a complete stranger asking them to take
your photo. With a tripod, there is no more wondering if the
person taking your photo including everything in
it the way you wanted it.
Below we describe using your
tripod as well as some of the camera features
you must be familiar with. If you are
taking a tripod on your trip, practice using it
with your camera. Practice your
self-included photos with extended timer,
extended zoom photos with short timer and
night time photos with short timer and adjusted
camera exposure setting.
|
|
|
Some
camera basics |
|
Timer: |
To take self photos
using your tripod, you must know how to
work your camera's timer. Most cameras have easy to access and use functions allowing
you to set the shutter timers in two
different modes. The length of
time may vary by camera, but in general
they are something like 2 and 10 second
delays.
The short 2
second timer can be used when taking extended zoom
photos and night photos where
you will require the camera to be held
completely still to avoid blurriness in
your photos. This allows you to
take photos quickly without having to
hit the shutter yourself and jar the
camera.
The longer 10 second timer allows you
time to click the shutter and get into
the photo before the shutter snaps. |
|
Exposure
Setting: |
Many cameras have a
dedicated button for the Exposure
Settings. The setting allows you
to control how long the shutter stays
open, usually having values of -2 to +2.
When taking night photos, you will want
to set the exposure so that the
shutter stays open longer to capture
more light. A negative number
means the shutter will stay open a
shorter amount of time letting in less
light and a larger number means the
shutter will stay open a longer amount
of time letting in more light.
Depending on your
camera, you may need to select a special
night setting before adjusting the
exposure will take effect. |
|
Photo Directory
Reset: |
Most digital cameras
should have the ability reset the
current photo directory. This will
allow you to group your photos by
location or activity so that all related
photos are in the same directory.
 After you reset the photo directory for
photos at a new location, if possible,
take at least one photo of a sign or
some other information that will help
you identify where the photo was taken.
 |
|
Self Included
Photos: |
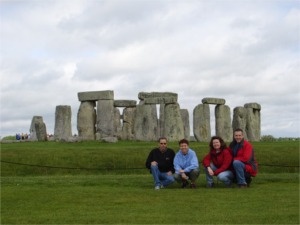
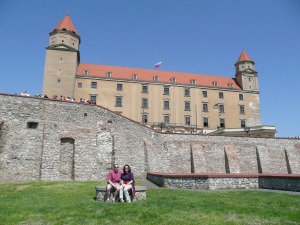
A typical use for
your tripod will be to include yourself
in the photo while taking the photo from
a distance. With your camera on
the tripod,
set it up to capture the photo you want
making note of where you want to be
included in the photo. Set your
camera timer and click the shutter.
Get over to your location before the
timer expires and the shutter
clicks...smile.
 |
 |
|
Stonehenge - England |
Bratislava Castle - Slovakia
|
|
|
Night Photography: |
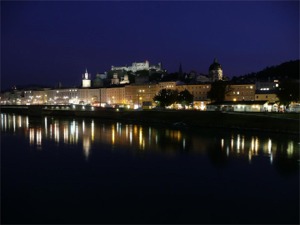
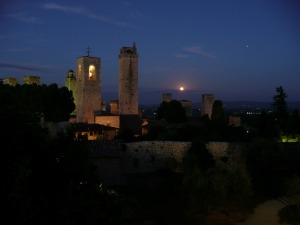
When taking night
photos you will more than likely be
using a longer exposure time to capture more
light. When doing this, the camera
must be held completely still to avoid
blurring the photo. You may want
to take multiple photos and compare on
the camera's view screen to find the
best exposure setting for the
conditions.
 |
 |
|
Salzburg Castle - Austria |
San Gimignano - Tuscany
Italy |
|
|
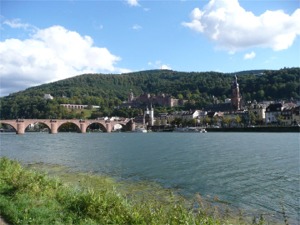
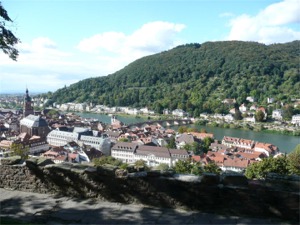
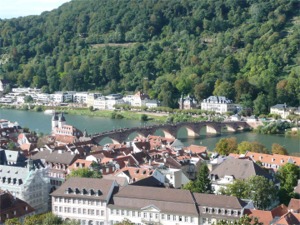
Extended Zoom: |
When using your
camera's extended zoom, having a tripod
will prove invaluable by keeping the camera steady.
The farther you zoom, the steadier the
camera must be held to avoid blurry
photos.
 |
 |
|
Heidelberg Castle - Germany
(Far) |
Heidelberg Castle - Germany
(Zoom) |
|
|
 |
 |
|
Heidelberg Bridge - Germany
(Far) |
Heidelberg Bridge - Germany
(Zoom) |
|
|
Carrying the
Tripod: |
When your tripod
legs are compressed,
it should fit easily into your
daypack. As an alternative, simply
insert one leg of it into your pants belt
where it should stay secure. (we
do not recommend keeping the camera
attached to it should you be using the belt
carrying method) |
 When using your tripod, be conscious of your
surroundings.
You don't want someone snatching your
tripod and camera away while you are
standing waiting for your photo to be
taken. Kids could run by or
someone on a bicycle and easily grab it. In a crowded area, you
do not want someone accidently
stumbling over your tripod, knocking it
over and breaking your camera. Use
your tripod when it's safe to do so and
people are at a distance.
There are many
different styles and sizes of tripods to
choose from, but from our experience and
multiple trips, we have
found this inexpensive, compact yet high telescoping
tripod to work the best.
|
Polaroid 42
inch Extended Travel Tripod |
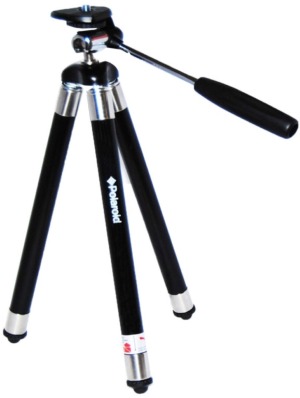
Fully Extended
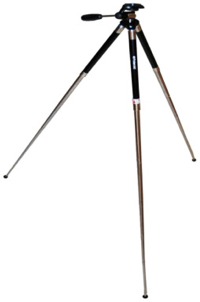 |
This is our tripod
of choice and it is perfect for travel due
to it's size and features. It can
be used with the legs compacted, partially or fully
extended.
 One big advantage to this tripod, compared to a selfie stick/tripod that has fixed length legs is that you can easily use it on uneven ground or an extreme slope by simply adjusting the legs to different lengths.
We recommend this
style of tripod and have used it for
years. You will find the same
tripod sold under many different names
but it is essentially the same one.
It can be found on Amazon, but at the
same time we found it at Wal-Mart.
Prices can vary so shop around for the
best deal.
- Approximate Dimensions: 11 x 2 x 2
inches
Approximate
Weight: 1 pound (is slightly heavy as
it's made of metal, but it is durable
and will hold up for years of travel)
Compacted
length: 11 inches
Extends to
42 inches
Non-slip
rubber feet
Fully
rotational camera platform
2-way
pan/tilt head
Rotating leg
locking mechanism (each leg) when
fully extended
Tripod can
hold approximately a 1 pound camera
Standard
screw in mount for camera bottom
 Extending
the Legs
To extend a
leg, slightly pull on one of the rubber
feet. When you can,
grab the metal leg section and
continue to expand the leg by
pulling on each section
independently. Do not continue
to pull the rubber foot and do not
use excessive force to extend the
legs. Turning the legs as you
pull may help them to be extended.
 Locking the
Legs
Each leg has a locking mechanism.
When a leg is fully extended, simply
turn the leg clockwise until it
clicks, locking the leg in place and
preventing it from compressing.
 Closing the Legs
Before compressing a leg, if it is
locked into position, simply turn it
clockwise again until it clicks,
unlocking the leg.
Do not put your hand at the end of
an extended leg and try to compress the
entire leg at once or you may end up
bending it and ruining the
tripod. Compress each leg from the
largest section first, pushing it
into the unit. Work your way down
to the smallest section until the
entire leg has been compressed. It
may help to give each section a
slight turn during the compression
process.
|
|
|